Showing posts with label Six Traits of Writing. Show all posts

Monday, October 20, 2014

BOLD Beginnings!

Each year I'm dying with excitement to teach Bold Beginnings. It's like I want to just jump right in and skip every other important piece of writing because once I teach kids about Bold Beginnings, their writing becomes amazing! 

So last week my world became complete. I was able to teach my 2nd graders the best thing ever, BOLD BEGINNINGS! Yay! I love it!

OK, rewind. . . I was also really impressed by how well my students picked up on this temporal words activity. 
We put together the temporal word notebook page in out Interactive Notebooks. The students will use it to reference while writing. Right now, the kids are writing a personal narrative after tons of class practice.
Interactive Notebooks, where have you been my whole life?
I just love how the kids have these notes to look  back on. 

OK back to the Bold Beginnings!

It all started with this book.
It's filled with sounds heard throughout a city, which is a great way to introduce onomatopoeia.  
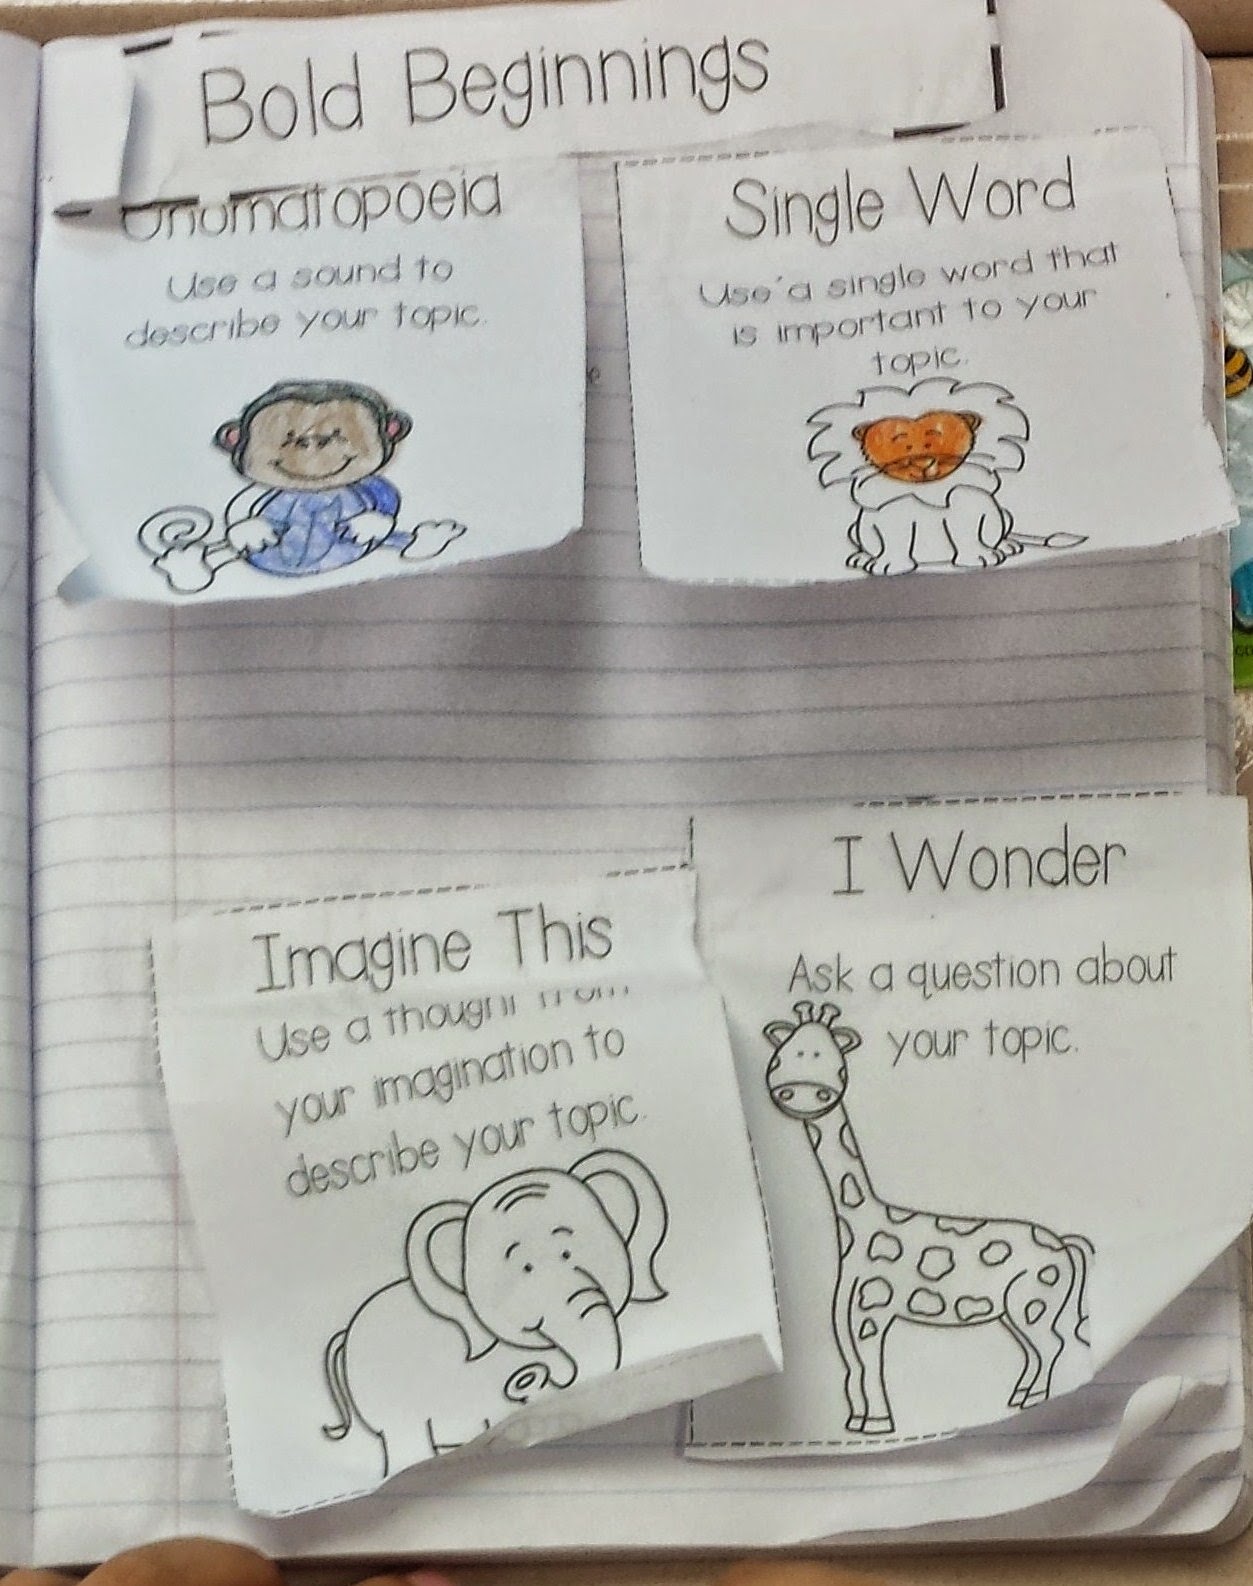
 That's a real life kid page right there.

We put together this notebook page and wrote a Bold Beginning under each flap. The kids had so much fun making the Oo oo! Ah ah! noises of a monkey.

Once we tried out each B.B., we chose a new topic. . . Halloween!

Kids worked in groups to write all four of the B.B.

Here is our collection of Bold Beginnings.

The thing I enjoy most about teaching writing is teaching kids to let go of spelling. 

"Don't worry about your spelling!" I say. And once kids let go, you get some great writing.

More practice. More fun!

Today my students had to apply this new learning to their narratives. Each was able to write four different Bold Beginnings to topics of their choosing. I was so proud of them.
The best part, they had fun writing!

Mission accomplished.

Thursday, September 11, 2014

This Week with our Interactive Notebooks II

So last week my students worked on adding details to simple sentences and to be more specific in their writing. The week before that, the kids learned about ideas and "juicy details."
Ideas
Juicy Details
Adding details
Be Specific
This week we took our knowledge of "being specific" and used a graphic organizer, called a funnel, to move from a broad topic to something more specific. 
funnel

Broad to specific
I showed the students a "photo album" (PowerPoint) of our pretend trip to the zoo. It showed the San Diego Zoo, some animals, a giraffe, a woman feeding the giraffe, and a giraffe's tongue. So we took a very broad topic (a trip to the zoo) and made it much more specific (feeding a giraffe at the zoo). I tell the kids that finding one specific part of a trip, day, birthday. . .makes your writing more interesting.

Now that we've covered the important components of Ideas, I will read various mentor texts to the class so students can see how authors use the trait.

On Thursday, I read Enemy Pie by Derek Munson.
Enemy Pie
The story is about a little boy with an enemy. His dad comes up with a plan to get rid of his enemy, which is to make an enemy pie.

There's so much  more to this story, but I was just getting to the point of the activity. It's a really cute story. I recommend it like I do every mentor text I suggest in the Interactive Writing Notebook.

After reading the book, we discussed the ideas the author used is his story. The story gets kids' imaginations going thinking about the ingredients in an enemy pie. So, the activity I created gets kids using their ideas to come up with the ingredients in the pie.


Usually my students put gross things in their pies. For some reason these kids didn't. Hmmm.


Next week we will begin a narrative using everything we've learned. I will expect students to choose an idea, be specific in their writing, and add details to make writing more interesting. Now that they have some tools, it should be fun!
http://www.teacherspayteachers.com/Product/Interactive-Writing-Notebook-for-the-Primary-Grades-Free-Gift-With-Purchase-1312923

Friday, September 5, 2014

This Week with our Interactive Notebooks

This week our class was able to put together two pages of our Interactive Writing Notebooks. I created this notebook to get kids excited about writing. Kids enjoy writing when we give them the tools to become good writers. They also become more excited about writing when we free them of being perfect spellers. The number one question I hear while students are writing is, "How do you spell . . ?" I just tell them not to worry about it and just get your ideas out.

So this week we practiced using details to describe some animals. Often we read I saw _____ from our students. I figured, why not spruce it up with some detail. And so they did.


Now I know there's no writing for you to read. That's because, after taking ten pictures, these were the best ones. So many cute sentences. So many blurry pictures. 

The sentences said things like. . . I saw a green and red owl. Or I saw a stinky gray raccoon.


One of my favorite activities is Be Specific. A few years ago I told students they need to be specific in their writing without explaining what that meant. What was I thinking?! So after realizing I should probably explain that word, I told a little story.
It goes like this:

Sam wanted a dog, so he asked his mom for one. 
The next day Sam's mom brought home a big, white dog with floppy ears.
Sam said, "No mom. I wanted a small, white dog."
The next day his mom brought him a new dog. It was a small, white dog with floppy ears.
Sam said, "No mom. I wanted a small white dog with tiny ears.
The next day his mom brought home a small, white dog with tiny ears.
Sam said, "No mom. I wanted a small, white dog with tiny ears and brown spots."
At this point his mom was frustrated and she said, "You should have been more specific!"

This story might not be pet-friendly, but the kids love it. I have little pictures I show them. I explain to them that being specific, or exact, helps your reader understand your writing better.

Here are some of their specific dogs.


We'll do more activities, which include the kiddos being more specific so they can gain a deeper understanding of the word. This is just to get them started.

These activities can be found in my product at TpT. Your kids will love it!

http://www.teacherspayteachers.com/Product/Interactive-Writing-Notebook-for-the-Primary-Grades-Free-Gift-With-Purchase-1312923

Wednesday, July 23, 2014

The Writing Table: The Color Dictionary


All of my students are familiar with the writing table. It's my favorite place in the classroom. It has so many great resources. It probably has too much stuff on it. I probably need a bigger writing table.

The writing table is where kids go to make their writing better, to find some cool writing supplies, and to sit if they need a time out . . . I don't have another place for them to sit.

So what's on the writing table that makes it my favorite place in the classroom? I'll show you!

This week, I'll tell you about the Color Dictionary. 

 To make your own Color Dictionary you'll need a box of 64 or more Crayola crayons, some blank paper, and a folder or something to store your dictionary. I don't buy crayons other than Crayola so I'm not sure if you can use other brands. It's all about the color names that Crayola uses.
On separate sheets of paper, write or print out basic colors--red, pink, orange, yellow, green, blue, purple, and brown.

Pour out all of your crayons and separate them into piles based on color. As you can see, I put my crayons in cups.

Take one of the piles and the matching sheet of paper. For example, the paper that reads "orange" and all of the shades of orange crayons.
Color a sample of the crayon color on the page. Next to the sample, write the color that is written on the side of the crayon. I typed the colors out because I'm a perfectionist.
 Continue repeating this with each shade of the color you are working on. Do the same with each color.
 Finally put the Color Dictionary together in a folder or binder.
 I have done this activity with my entire class and gave each group a color to work on together. It worked out fine.

So how does this Color Dictionary work?

When student's are in the revising stage of writing, they go to the writing table to make their writing better. One way they do this is by adding color detail. If a student is describing his brown dog, he goes to the Color Dictionary and turns to the Brown page, looks through all of the shades of brown then decides which shade of brown his dog matches. 

So instead of writing My brown dog is the best!, he would write My brown chestnut brown dog is the best!

Kids absolutely love using the Color Dictionary. It's probably one of the best ways to teach revising. I mean how many times have you asked your kids if there's anything they can add to make their writing better? With the Color Dictionary, you can remind them to add colors to make their writing better.

As you're reading your student's writing, you'll be so entertained. You'll actually want to read it! Did I just say that? Come on, you know their writing can get a little boring. With the Color Dictionary, kids will have more fun and it'll shine through!

If you liked this idea, check out this post.

I have made the color dictionary available:
https://docs.google.com/file/d/0B4dkVYoybDGRRzNYRkhpNDc1MGM/edit


Related Posts Plugin for WordPress, Blogger...